All Activity
- Earlier
-
try! Swift Tokyo

-
Deep Dish Swift 2025
 Gerd Großmann posted an event in Swift Events
until
Josh Holtz founded Deep Dish Swift in September of 2022 out of a deep love for developer conferences. Deep Dish Swift is hosting its third conference in Chicago in 2025. The conference aims to bring together developers of all experience levels and backgrounds in an inclusive environment to share knowledge and experience from a diverse set of speakers. Deep Dish Swift 2025 | April 27t...Deep Dish Swift 2025 | April 27th to April 29thA supreme Swift developer conference being served in Chicago, Illinois -
iOSKonf
 Gerd Großmann posted an event in Swift Events
until
At iOSKonf, we take pride in being the biggest iOS-focused event on the Balkans, offering a meticulously crafted experience for attendees, speakers and sponsors. From engaging sessions to meaningful networking opportunities, we’re committed to creating an intimate and enriching experience that goes beyond the traditional tech conference. -
SwiftLeeds
 Gerd Großmann posted an event in Swift Events
until
A worldwide Swift conference in the ♥️ of Leeds, 7-8 Oct. Founded by @adam9rush & Community 🚀 Sponsorship: info@swiftleeds.co.uk 🫶🏼 https://swiftleeds.co.uk/ @ The Playhouse, Leeds -
WWDC 2025
 Gerd Großmann posted an event in Swift Events
until
Apple's Worldwide Developers ConferenceApple DeveloperWWDC25Join the worldwide developer community online for a week of technology and creativity. -
Version 1.0.0 released on App Store
 Gerd Großmann posted a news article in Pulse4FitnessFinally, I released Pulse4Fitness 1.0.0 on the App Store. It took me two and a half years to get to this point. Developing as a hobby besides a full time job and family is not always easy. But I'm proud that I've come so far. An introduction how to create your workout plan with custom exercises and algorithms click here.
 -
Version 1.2 available in App Store
 Gerd Großmann posted a news article in BuzzinJasminWe had to update several internal functions and had to provide a new app icon. No new functionality added.
 -
How to create a workout plan
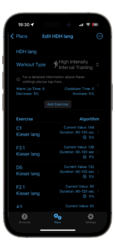
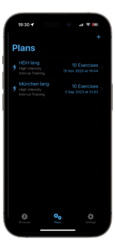
 Gerd Großmann posted a news article in Pulse4FitnessTo create a complete workout there are a few steps you have to do beforehand. You need iOS 18 and watchOS 11! Create an algorithmGo to settings and add an algorithm. Open your newly created algorithm. In your algorithm you can add segments to define your workout rhythm. The segment is responsible which haptic feedback and sound your algorithm does when performing a workout. There is no need to change the type but it doesn't make very much sense when you add 5 pause types, f.e. Prepare Can be used for preparation time to get in position. Plays a sound every second. Sound is different from Action and Cooldown sound. Pause Can be used as a divider between other actions. Doesn't make any sound. Action Can be used when you need a constant rhythm. Plays a sound every second. Sound is different from Prepare and Cooldown sound. Cooldown Can be used as a divider between other actions or for action without a sound every second. Plays a sound at the beginning and the end. Sound is different from Action and Prepare sound. The colors represent the colors on your watch when actually performing your workout. So you always know in which step you are. You can add as many algorithms you want. But you can reuse them for different exercises and different plans. Create an exerciseWhile in settings create an exercise and open the new exercise to edit it. Enter Name You must enter a name so that you can recognize it when adding it to a plan. Exercise Value (optional) When doing a weight lifting or an other exercise where you need a value you can enter it here. If you don't need it, leave it at 0. This value can be handy when you reach a certain threshold and you want your value adapted for your next exercise. Enter settings (optional) This is just for your infornation and not needed. Used in Plans An overview in which plans you use this app. Could be useful if you want to delete an exercise. When you delete an exercise it will be removed from any plan it is used in. You can use an Exercise in more than one Plan and more than once in a Plan. Even with different Exercise Values. You can set this in your Plan individually (see Edit Exercise in Plan). Create a planNow you can add a plan and configure it with your created exercises and algorithms. You can add as many exercises (with its algorithms) to a plan as you like (and as you can handle). You must enter a name for your Plan and can select a workout type. The workout types are the same you can select in the official workout app. The selection is reduced to types where this kind of workout makes sense. Additional workout types can be added should it be necessary. Pressing the button "Add Exercise" lets you add an exercise and the algorithm the exercise should use. After adding an exercise you can edit the options for each exercise individually if you want to do so. Edit Exercise in PlanWhile editing your plan you can set for each of your exercises either a time or a repetition limit. After it reaches the time or repitition limit the watch app stops the algorithm for this exercise. If you choose the time limit you don't have to calculate the repetition limits. The watch app adapts to your repetitions and stops in the middle of an algorithm as soon as the maximum time is reached. If you choose to enter an Exercise Value you can let the app adapt these values automatically for you for a certain amount or a percentage. F.e. if you have an exercise where you are allowed to increase the value for your next exercise when reaching the maximum time/repetitions you can set it here. Same goes for decreasing when you don't reach the minimum. If you don't need the adaptions leave them at zero. If you set an Exercise Value of 0 this setting is ignored. Now start your watch app and do your workout 🏋️♂️🤸♂️🙂
 -
Rebuild the Create New Content Menu from InvisionCommunity Version 4
 Gerd Großmann posted a post in a topic in Developer BlogWith the release of version 5 of Invision Community we lost (as of version 5.0.3) the create new content menu besides the user menu. With this instructions you can recreate it very easily. The template adds create links for available databases in Pages, Forums, Gallery and Downloads. I haven't found a reliable method for Blogs. In your ACP go to Customization -> Themes and enable the Theme Designer. In the above picture it is already enabled. Now select the menu in your prefered theme (or the parent theme, this should inherit it to the sub themes, didn't try it). Now create a new template. In the following menu enter a prefered name and use the settings shown in the picture. Paste the following code into the HTML section. {{ $cmsEnabled = false; }} {{ $forumsEnabled = false; }} {{ $galleryEnabled = false; }} {{ $downloadsEnabled = false; }} {{ $counter = 0; }} {{foreach \IPS\Application::enabledApplications() as $appl}} {{ $c = get_class($appl); }} {{if $c == 'IPS\gallery\Application'}} {{if \IPS\gallery\Category::canOnAny( 'add' ) }} {{ $galleryEnabled = true;}} {{endif}} {{elseif $c == 'IPS\forums\Application'}} {{if \IPS\forums\Forum::canOnAny( 'add' ) }} {{ $forumsEnabled = true;}} {{endif}} {{elseif $c == 'IPS\downloads\Application'}} {{if ( \IPS\downloads\Category::canOnAny('add') OR \IPS\downloads\Category::theOnlyNode() ) }} {{ $downloadsEnabled = true; }} {{endif}} {{elseif $c == 'IPS\cms\Application'}} {{foreach \IPS\cms\Databases::databases() as $database}} {{if $database->can( 'add' ) }} {{ $cmsEnabled = true; }} {{endif}} {{endforeach}} {{endif}} {{endforeach}} {{if $cmsEnabled or $forumsEnabled or $galleryEnabled or $downloadsEnabled }} <ul class="ipsNavBar" data-role="menu"> <li data-id="1" data-active="" data-navapp="core" data-navext="Menu"> <button aria-expanded="false" aria-controls="elNavSecondary_100{$counter}" data-ipscontrols="" type="button"> <span class="ipsNavBar__icon" aria-hidden="true"> <i class="fa-solid fa-bars-staggered"></i> </span> <span class="ipsNavBar__text"> <span class="ipsNavBar__label">+ {lang="add"}</span> <i class="fa-solid fa-angle-down"></i> </span> </button> <ul class="ipsNav__dropdown" id="elNavSecondary_100{$counter}" data-ips-hidden-light-dismiss="" style="--i-animating-height: 336px;" hidden=""> {{foreach \IPS\cms\Databases::databases() as $database}} {{if $database->can( 'add' ) }} {{$counter = $counter + 1;}} <li data-id="100{$counter}" data-navapp="cms" data-navext='{lang="cms_add_new_record_button" sprintf="$database->recordWord( 1 )"}'> <a href="{$database->get_Page()->url()}?&do=form&d={$database->get__id()}" data-navitem-id="100{$counter}" data-ipsdialog="1" data-ipsdialog-size="narrow" data-ipsdialog-title='{lang="choose_category"}' > <span class="ipsNavBar__icon" aria-hidden="true"> <i class="fa-solid" style="--icon:'\f87c'"></i> </span> <span class="ipsNavBar__text"> <span class="ipsNavBar__label">{lang="cms_add_new_record_button" sprintf="$database->recordWord( 1 )"}</span> </span> </a> </li> {{endif}} {{endforeach}} {{if $forumsEnabled }} {{$counter = $counter + 1;}} <li data-id="100{$counter}" data-navapp="forums" data-navext='{lang="select_forum"}'> <a href="/forums/startTopic/" data-navitem-id="100{$counter}" data-ipsdialog="1" data-ipsdialog-size="narrow" data-ipsdialog-title='{lang="select_forum"}' > <span class="ipsNavBar__icon" aria-hidden="true"> <i class="fa-solid" style="--icon:'\f87c'"></i> </span> <span class="ipsNavBar__text"> <span class="ipsNavBar__label">{lang="start_new_topic"}</span> </span> </a> </li> {{endif}} {{if $galleryEnabled }} {{$counter = $counter + 1;}} <li data-id="100{$counter}" data-navapp="gallery" data-navext='{lang="choose_category"}'> <a href="/gallery/submit/?_new=1" data-navitem-id="100{$counter}" data-ipsdialog="1" data-ipsdialog-size="medium" data-ipsdialog-extraclass="cGalleryDialog_outer" data-ipsdialog-destructonclose="true" data-ipsdialog-remotesubmit="true"> <span class="ipsNavBar__icon" aria-hidden="true"> <i class="fa-solid" style="--icon:'\f87c'"></i> </span> <span class="ipsNavBar__text"> <span class="ipsNavBar__label">{lang="add_gallery_image"}</span> </span> </a> </li> {{endif}} {{if $downloadsEnabled }} {{$counter = $counter + 1;}} <li data-id="100{$counter}" data-navapp="downloads" data-navext='{lang="choose_category"}'> <a href="/files/submit/?_new=1" data-navitem-id="100{$counter}" data-ipsdialog="1" data-ipsdialog-title='{lang="choose_category"}' data-ipsdialog-size="narrow"> <span class="ipsNavBar__icon" aria-hidden="true"> <i class="fa-solid" style="--icon:'\f87c'"></i> </span> <span class="ipsNavBar__text"> <span class="ipsNavBar__label">{lang="submit_a_file"}</span> </span> </a> </li> {{endif}} </ul> </li> </ul> {{endif}}Now save the template and your new create button should be available for your users. View full dev blog entry
 -
Rebuild the Create New Content Menu from InvisionCommunity Version 4
 Gerd Großmann posted a dev blog entry in App DevelopmentWith the release of version 5 of Invision Community we lost (as of version 5.0.3) the create new content menu besides the user menu. With this instructions you can recreate it very easily. The template adds create links for available databases in Pages, Forums, Gallery and Downloads. I haven't found a reliable method for Blogs. In your ACP go to Customization -> Themes and enable the Theme Designer. In the above picture it is already enabled. Now select the menu in your prefered theme (or the parent theme, this should inherit it to the sub themes, didn't try it). Now create a new template. In the following menu enter a prefered name and use the settings shown in the picture. Paste the following code into the HTML section. {{ $cmsEnabled = false; }} {{ $forumsEnabled = false; }} {{ $galleryEnabled = false; }} {{ $downloadsEnabled = false; }} {{ $counter = 0; }} {{foreach \IPS\Application::enabledApplications() as $appl}} {{ $c = get_class($appl); }} {{if $c == 'IPS\gallery\Application'}} {{if \IPS\gallery\Category::canOnAny( 'add' ) }} {{ $galleryEnabled = true;}} {{endif}} {{elseif $c == 'IPS\forums\Application'}} {{if \IPS\forums\Forum::canOnAny( 'add' ) }} {{ $forumsEnabled = true;}} {{endif}} {{elseif $c == 'IPS\downloads\Application'}} {{if ( \IPS\downloads\Category::canOnAny('add') OR \IPS\downloads\Category::theOnlyNode() ) }} {{ $downloadsEnabled = true; }} {{endif}} {{elseif $c == 'IPS\cms\Application'}} {{foreach \IPS\cms\Databases::databases() as $database}} {{if $database->can( 'add' ) }} {{ $cmsEnabled = true; }} {{endif}} {{endforeach}} {{endif}} {{endforeach}} {{if $cmsEnabled or $forumsEnabled or $galleryEnabled or $downloadsEnabled }} <ul class="ipsNavBar" data-role="menu"> <li data-id="1" data-active="" data-navapp="core" data-navext="Menu"> <button aria-expanded="false" aria-controls="elNavSecondary_100{$counter}" data-ipscontrols="" type="button"> <span class="ipsNavBar__icon" aria-hidden="true"> <i class="fa-solid fa-bars-staggered"></i> </span> <span class="ipsNavBar__text"> <span class="ipsNavBar__label">+ {lang="add"}</span> <i class="fa-solid fa-angle-down"></i> </span> </button> <ul class="ipsNav__dropdown" id="elNavSecondary_100{$counter}" data-ips-hidden-light-dismiss="" style="--i-animating-height: 336px;" hidden=""> {{foreach \IPS\cms\Databases::databases() as $database}} {{if $database->can( 'add' ) }} {{$counter = $counter + 1;}} <li data-id="100{$counter}" data-navapp="cms" data-navext='{lang="cms_add_new_record_button" sprintf="$database->recordWord( 1 )"}'> <a href="{$database->get_Page()->url()}?&do=form&d={$database->get__id()}" data-navitem-id="100{$counter}" data-ipsdialog="1" data-ipsdialog-size="narrow" data-ipsdialog-title='{lang="choose_category"}' > <span class="ipsNavBar__icon" aria-hidden="true"> <i class="fa-solid" style="--icon:'\f87c'"></i> </span> <span class="ipsNavBar__text"> <span class="ipsNavBar__label">{lang="cms_add_new_record_button" sprintf="$database->recordWord( 1 )"}</span> </span> </a> </li> {{endif}} {{endforeach}} {{if $forumsEnabled }} {{$counter = $counter + 1;}} <li data-id="100{$counter}" data-navapp="forums" data-navext='{lang="select_forum"}'> <a href="/forums/startTopic/" data-navitem-id="100{$counter}" data-ipsdialog="1" data-ipsdialog-size="narrow" data-ipsdialog-title='{lang="select_forum"}' > <span class="ipsNavBar__icon" aria-hidden="true"> <i class="fa-solid" style="--icon:'\f87c'"></i> </span> <span class="ipsNavBar__text"> <span class="ipsNavBar__label">{lang="start_new_topic"}</span> </span> </a> </li> {{endif}} {{if $galleryEnabled }} {{$counter = $counter + 1;}} <li data-id="100{$counter}" data-navapp="gallery" data-navext='{lang="choose_category"}'> <a href="/gallery/submit/?_new=1" data-navitem-id="100{$counter}" data-ipsdialog="1" data-ipsdialog-size="medium" data-ipsdialog-extraclass="cGalleryDialog_outer" data-ipsdialog-destructonclose="true" data-ipsdialog-remotesubmit="true"> <span class="ipsNavBar__icon" aria-hidden="true"> <i class="fa-solid" style="--icon:'\f87c'"></i> </span> <span class="ipsNavBar__text"> <span class="ipsNavBar__label">{lang="add_gallery_image"}</span> </span> </a> </li> {{endif}} {{if $downloadsEnabled }} {{$counter = $counter + 1;}} <li data-id="100{$counter}" data-navapp="downloads" data-navext='{lang="choose_category"}'> <a href="/files/submit/?_new=1" data-navitem-id="100{$counter}" data-ipsdialog="1" data-ipsdialog-title='{lang="choose_category"}' data-ipsdialog-size="narrow"> <span class="ipsNavBar__icon" aria-hidden="true"> <i class="fa-solid" style="--icon:'\f87c'"></i> </span> <span class="ipsNavBar__text"> <span class="ipsNavBar__label">{lang="submit_a_file"}</span> </span> </a> </li> {{endif}} </ul> </li> </ul> {{endif}}Now save the template and your new create button should be available for your users.
 -
 Redakteur changed their profile photo
 -
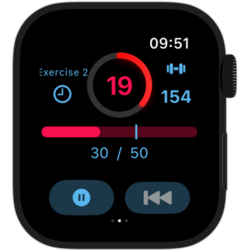
203 - Exercise view beyond target
 Gerd Großmann posted a gallery image in Pulse4Fitness
 -
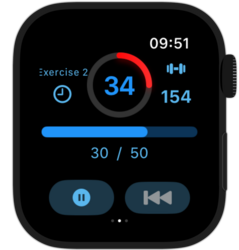
202 - Exercise view on target
 Gerd Großmann posted a gallery image in Pulse4Fitness
 -
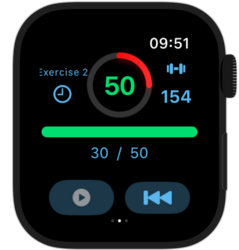
201 - Exercise view below target
 Gerd Großmann posted a gallery image in Pulse4Fitness
 -
108 - Plan statistics
 Gerd Großmann posted a gallery image in Pulse4Fitness
 -
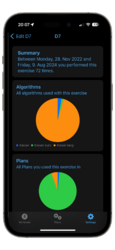
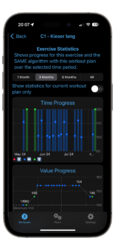
107 - Exercise statistics
 Gerd Großmann posted a gallery image in Pulse4Fitness
 -
106 - Detail view of your workout
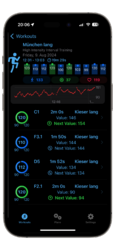
 Gerd Großmann posted a gallery image in Pulse4Fitness
 -
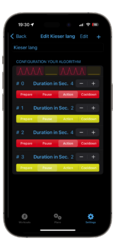
105 - Algorithm editor
 Gerd Großmann posted a gallery image in Pulse4Fitness
 -
104 - General app settings
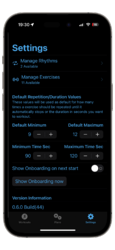
 Gerd Großmann posted a gallery image in Pulse4Fitness
 -
102 - Plan Details
 Gerd Großmann posted a gallery image in Pulse4Fitness
 -
101 - Workout Plans
 Gerd Großmann posted a gallery image in Pulse4Fitness
 -
100 - Workout List
 Gerd Großmann posted a gallery image in Pulse4Fitness
 -
999 - Pulse4Fitness
 Gerd Großmann posted a gallery image in Pulse4Fitness
 -
Build 57 released to TestFlight
 Gerd Großmann posted a news article in Pulse4FitnessBuild57 - Requires iOS 18 and watchOS 11 New in this build: New Chart after Workout on Apple Watch Swift 6 Conformance changes You can now test this app with TestFlight from Apple.
 -
Build 56 released to TestFlight
 Gerd Großmann posted a news article in Pulse4FitnessBuild 56 - Requires iOS 18 and watchOS 11 New in this build: Fixed crash in onboarding Under the hood changes You can now test this app with TestFlight from Apple.
 -
Build 55 released to TestFlight
 Gerd Großmann posted a news article in Pulse4FitnessBuild 55 - Requires iOS 17 and watchOS 10 New in this build: Heart rate statistics available in workout You can select if you want to show workout activitiy statistics for this plan only or not Workout plan is now used for workout activity statistics Improved UI workout statistics New statistics view for Exercises You can now test this app with TestFlight from Apple. New heart rate available for workout statistics:


